

New horse? Grumpy or sore horse? When asking a vet, horse friend, or google about it, it seems like the first recommendation is to get your saddle checked out, which typically leads to a rabbit hole of conflicting information.
When I was a kid, saddle fit wasn’t a thing with the ranchers or old school trainers. Our thick and chunky ranch horses were saddled up with what we had, padded out the wazzoo, then ridden all day. So when I got my current mare, 10 years later, I wanted her to be her best. But then, she got really backsore. I took to the internet and found that there was a lot more to saddles than I knew, bars were especially a pain to figure out. So I researched… a lot. Here is what I found:
The typical quarter horse will need either standard/semi quarter horse bars or full quarter horse bars. When saddles are made, they’re made around a wooden or fiber glass base. They have these “bars” that run down the spine, on both sides, from behind the horse’s shoulder to their hips. Bars distribute the rider’s weight along the back of the horse. The type of bars (standard/semi vs. full) refers to the angle of the bars from the center of the base.

Full quarter horse bars seem to be more prevalent in the western saddle market. Full bars have more “flare” from center, a wider angle, so they fit wider horses.
Semi/standard quarter horse bars have less “flare” from center, a more narrow angle, they fit skinnier/younger horses.
As a note, the bars your horse needs doesn’t necessarily equate to how muscular or fat your horse is. It’s mostly just how their back is built. My mare is very heavily muscled, but requires semi/standard bars. I cannot just look at a horse and say “this horse needs these bars”. It’s possible a true saddle fitter can, but for the normal person, probably not.
Measuring for bar type
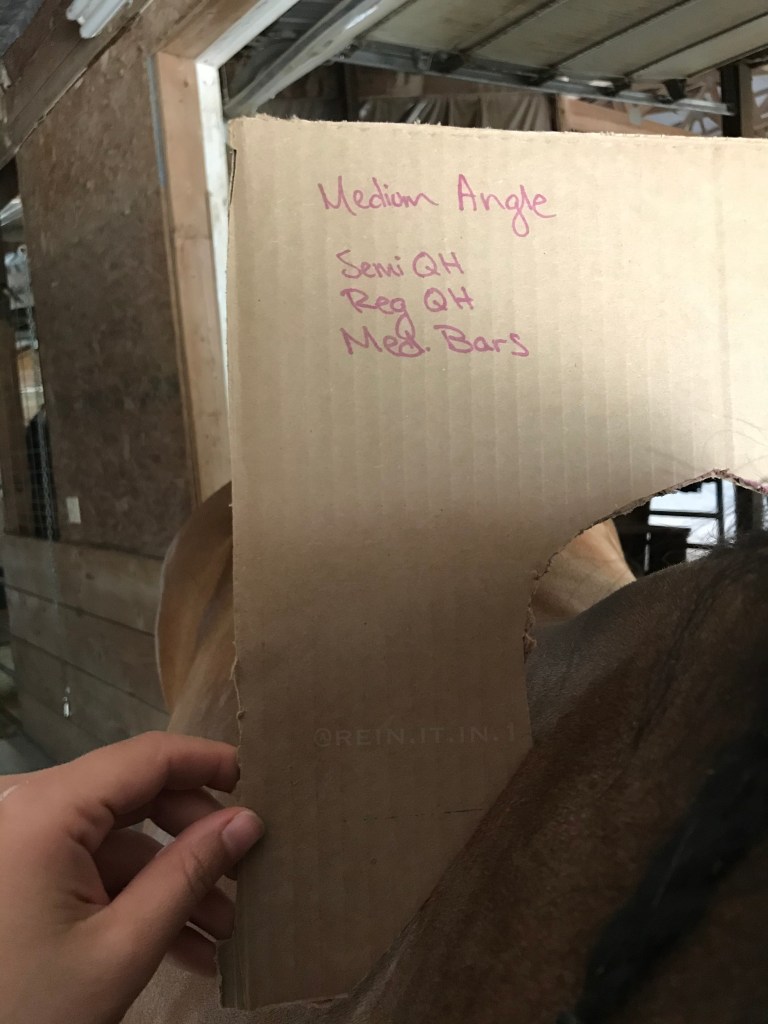
Horsesaddleshop.com is a great resource. They have these printable templates for standard/semi and full quarter horse bars. I printed them, cut them out, then taped them to cardboard, and cut cardboard to that template. From there, you place the template on your horse’s back, right behind the scapula. The upper piece of the template, which mimics a saddle’s mantle, should be free and clear of your horse’s withers. You want the angled piece to sit flat against your horse’s back, with complete contact, without any pressure from you. You should just be holding the template upright and not pushing down. If it doesn’t fit properly, you’ll see one part of the angled piece hit the back, then the opposite end not making contact with the back. So it will look like it’s pinching either on the top near the withers (too wide bar angle) or bottom (too narrow).

It’s good to do the first measurement behind the scapula, this mimics where the first concho of your saddle should be, and where a saddle’s bars start. This is where most pinching occurs, assuming saddles are placed on the horse’s back correctly. After I try the template behind the scapula, if it looks like it fits, I like to run it down the horse’s back just to see how their back changes in relation.
Gullet Size
Gullet size is a tough one. It’s also another one that people incorrectly report. Gullet size refers to the measurement from the underside of the saddle, from first concho on one side, to the first concho of the other side. This will determine how much with clearance you get with the saddle. If the saddle fits too low (cantle too close to the withers) then that gullet size is too big. If the saddle fits too high, then that gullet size is too small.
Unless you have calipers, there is not a great way to measure your horse’s gullet size. The method that got me the closest was to get a piece of baling twine (or string) and hold one end of the string from behind the scapula, at the point of the scapula, on one side of the horse, then bring the twine over the withers to that same spot on the opposite side of the horse, mark/hold that spot of twine, take the twine off your horse, then use a measuring tape to measure the end of the twine to where you marked it. It’s not perfect, but it gets pretty close. There are some decent youtube videos on this.
Trying saddles
This is the most difficult for several reasons. The biggest being that many saddles are not marketed or labeled correctly (if they’re labeled at all). An absurd amount of online saddle sale posts are incorrect about bar angles. Most people selling a saddle just label it as “full quarter horse bars” just because it “fits” their quarter horse, or because that’s what all the other posts say. My advice there is to google the maker brand and find out from forums/facebook groups what that maker is known for making. A lot of big makers like Billy Cook (Oklahoma) and Bob’s have a premade base that is some sort of hybrid between full and semi so their saddles aren’t labeled as semi or full bars. For instance, Billy Cook saddles from Oklahoma are known to fit closer to semi/standard bars. So you’ll have to make an informed decision and just try the saddle at some point.
Do you already have a saddle but have no idea what the bars are? I don’t have a good solution for you. But, what I’ve done in that case is take my cardboard templates, place it against the cantle of the saddle, and just eyeballed the angle differences. I can get pretty darn close at guessing a saddle’s bars by doing that.
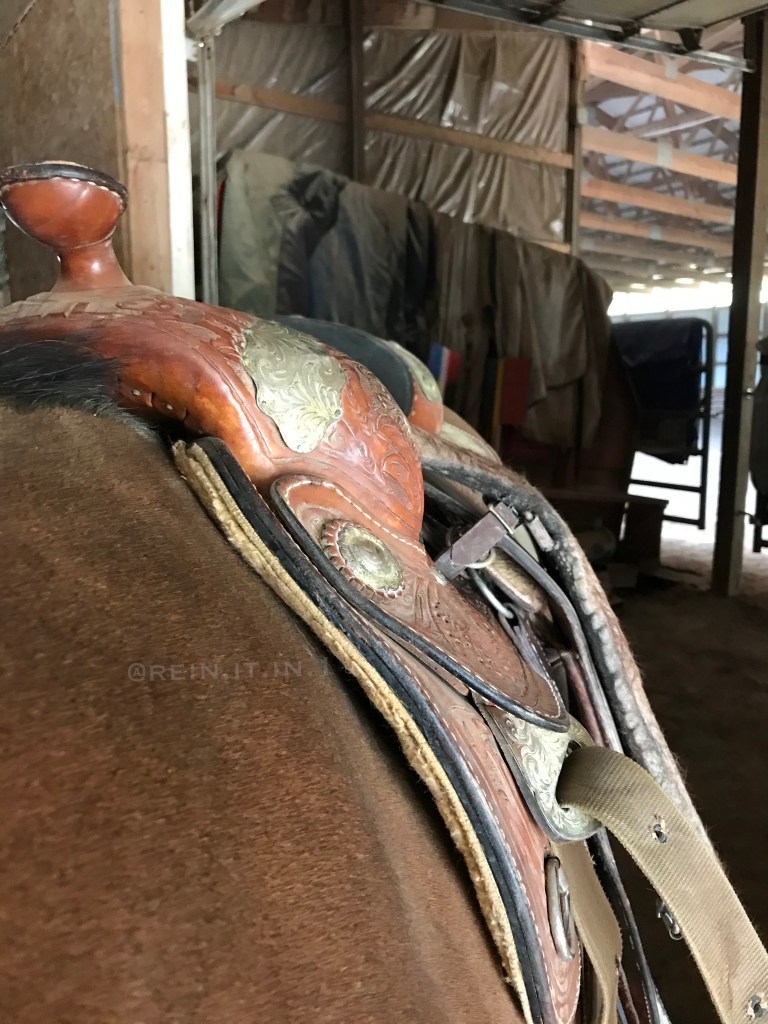
When you do have a saddle to try, set it on your horse’s back WITHOUT A PAD. Make sure the first concho is behind your horse’s scapula while standing square. Take your hand and slide it under the saddle at the first concho. You’ll feel the start of the bars. Keep your hand there a minute, conforming to your horse’s body, and feel for bar contact. Does it feel like there is a pressure point? Are the bars making full contact with your hand?
After testing that area, move your hand down the back of the horse. Keep your hand along the saddle bars, not the horse’s back. As you run your hand down, does your hand/the bars lose contact/pressure with the back? If contact is lost, this is called “bridging”. You don’t want a lot of bridging. Some people will claim you don’t want any. But, I had a saddle fitter tell me that just a little bridging can cause your horse to want to lift its back into the saddle, which is good for collecting. If you are not collecting your horse (trail horse or retired horse with light riding), then aim for no bridging at all.
If bars are good, make sure the mantle clears the withers well. You should be able to fit 3-4 fingers between the mantle and the withers.
Finally, make sure the bars don’t extend to the hips. This is rarely a problem but it’s good to note in case you have a short bodied horse.
Tack up, step back, and take a look
This is an important step. With a pad, take a step back and look at the saddle. Is it parallel with the ground? If it isn’t, then it doesn’t fit well.

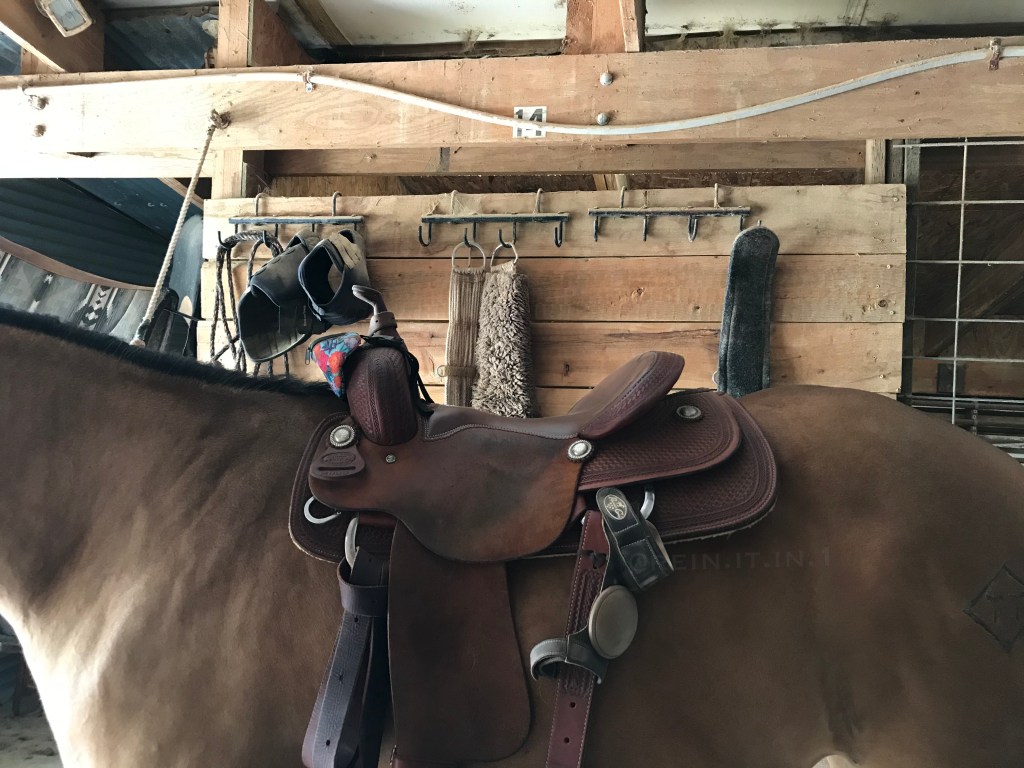

Time to ride
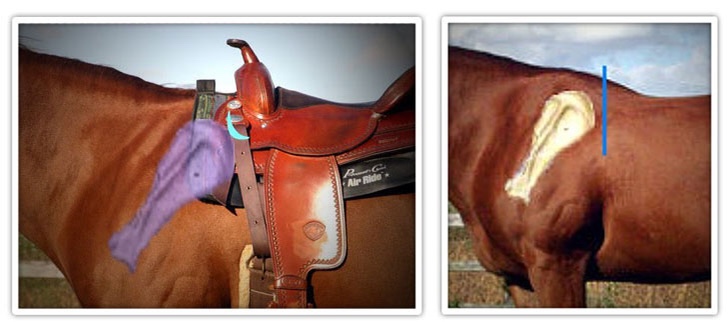
This has been the most controversial thing I’ve come across. The presence of dry spots….
Ideally, your horse should not have any dry spots after riding. It should be an even sweat pattern with your saddle pad. Make sure to ride in the saddle, not just lunge, because rider weight may change how the sweat patterns form.
Some people say all dry spots are bad, others say only the small ones are bad. So, what I write below is my opinion after doing a bunch of research and talking to my horse people, including saddle fitters. Feel free to come to your own opinion, but you’ll need to have that informed opinion before this step.
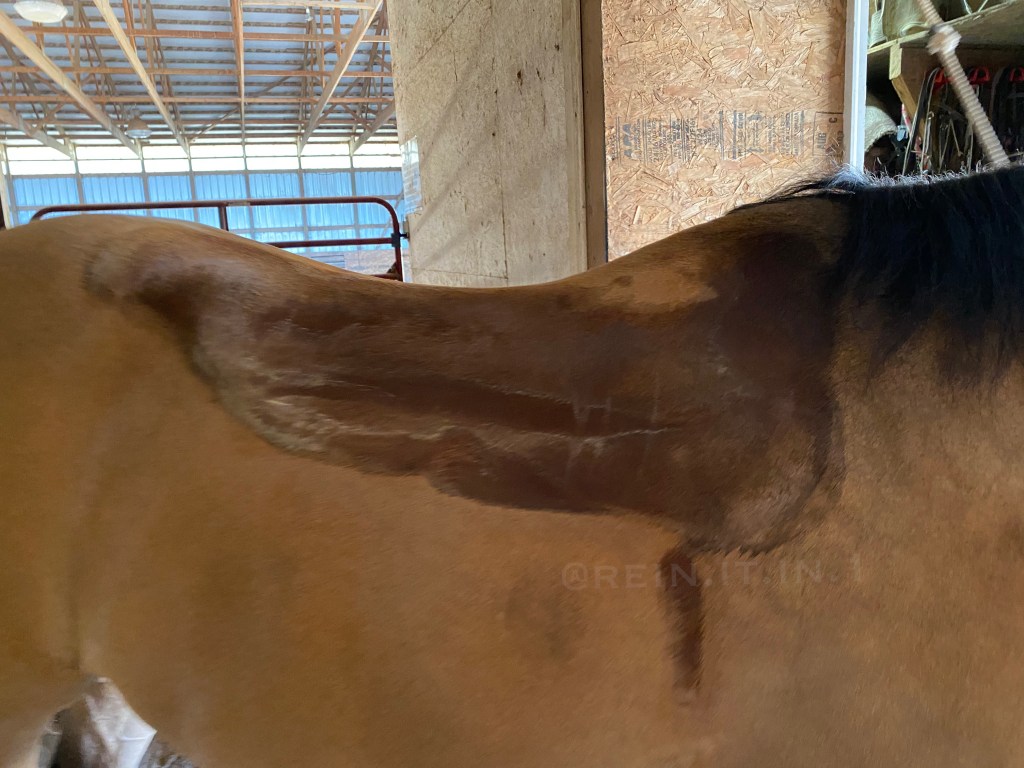
My opinion, is that the small dry spots are bad but the big dry spots, the size of a fist or bigger, are not. The small dry spots are indicative of pinching. If the saddle is pinching in one area, it cuts off circulation and will cause those little white spots you see on the withers of some horses. It can also cause some scar tissue like hard spots. If caught early, these things resolve to normal but if not, the horse will have permanent white spots.
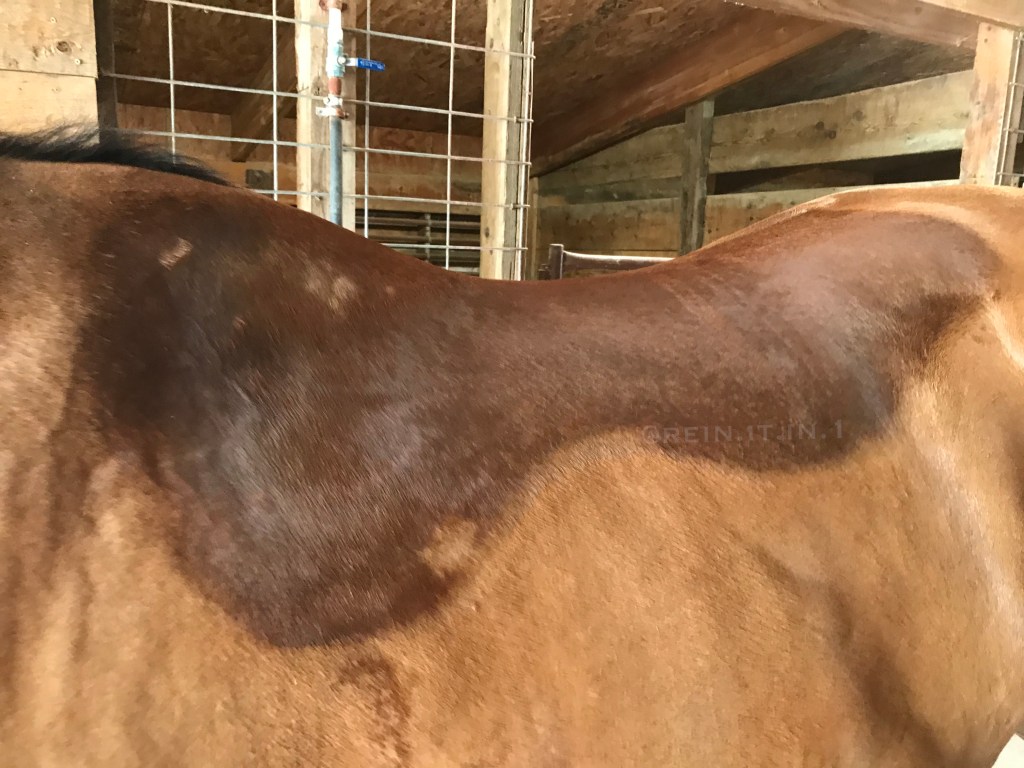
The big dry spots are indicative of well fitting bars. Sweat needs air. So if those bars are making good, complete contact behind the shoulders, then it doesn’t let airflow in. This isn’t necessarily a bad thing, it doesn’t cause pain, it just isn’t conducive to sweat forming. No white spots form and no hard tissue spots form with a big dry spot. I have tried a lot of saddles, and El has never had a saddle not form a dry spot. The difference is that the ill fitting ones left a quarter sized dry spot while the saddles that seemed to fit the best left and hand sized dry spot behind the shoulder. Once I swapped to a better fitting saddle, the chiropractor noticed that my mare was no longer sore at her shoulders, despite the big dry spot. So for now, that’s my opinion.
What about rider fit?
As far as how the saddle fits you, that is completely rider’s choice. Some people like to be held in their saddle, and some people like a little bit of freedom. It is personal preference and may also depend on your discipline. Some cutters and barrel racers like a smaller seat, while some reiners like a bigger seat. You’ll just have to do some trail and error. I personally like 3-4 fingers between my thigh and the cantle. That puts me at a 15 -15.5 inch seat (I’m 5’4 and petite). Don’t base your seat measurement to what you see online. Just because someone is your height/weight, does not mean you’re the same seat size (I’ve made that mistake before, I am definitely not a 14.5 inch seat).
A note about horse age
A piece of advice that I got a lot while searching for a saddle was to not get a custom saddle made to my 4 year old mare. Horse’s change over time, especially if they’re so young. So why spend the money and time waiting for a custom saddle that may not fit in 2 years? At first I brushed this advice off. But… as El has gotten older, I’ve noticed she’s slowly fitting into my wider saddle (not her daily saddle) a little better. So make sure to take that into account while looking for a saddle.
One last thing…
Buying saddles can be intimidating. The best way is through a tack shop that will let you take the saddle for a few days and test it. Sometimes, the local tack shops don’t have what you want/need. Try reputable consignment shops online or even horsesaddleshop.com. If you do buy one through an individual (online/facebook), you always run the risk of getting scammed. Insist that you pay via paypal (or another option that has purchase protection) and offer to split the fees with the seller. There are other ways to avoid scams but that’s for a future post…
Good luck out there!
